SSL certificate is very important for the security purpose of any website. In this article, I will tell you step by step how to install the Namecheap PositiveSSL certificate in a very easy way.
There are many steps to follow to install the PositiveSSL certificate.
Step 1: Buy PositiveSSL certificate
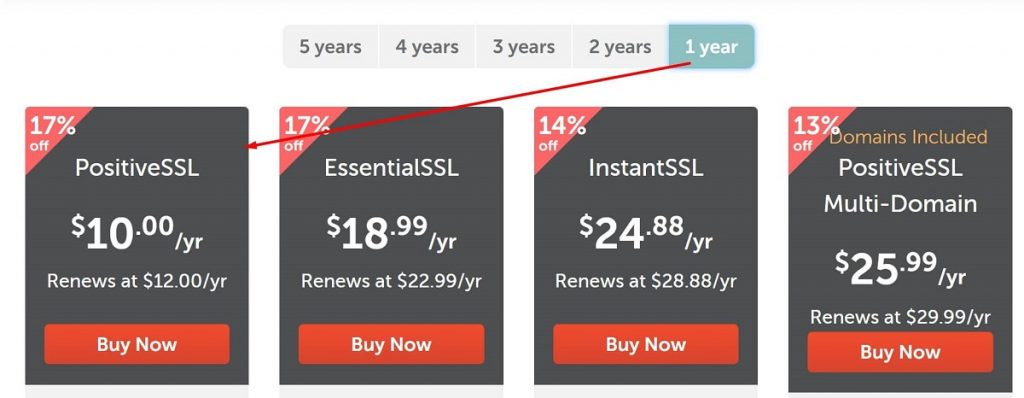
The first step is to buy the SSL certificate from NameCheap. For this, log in to your Namecheap account, then visit https://www.namecheap.com/security/ssl-certificates/ this page. On this page, you will find many offers including discounts. If you buy the SSL certificate for one year then the price will be a little bit expensive, but if you can buy the 5 years package, then you can get the maximum discount. So, it depends on you whether you will go with the 1-year package or a 2/3/4/5 year package. If you ask me what package do I like, I will say, I prefer the 5-year package.
What are the benefits of buying 5 years package?
- You will get maximum discounts. Suppose, if you buy the PositivieSSL certificate seperately for every year, then the price could be 10.00$. So, the total cost for (1 yrs+1 yrs+1 yrs+1 yrs+1 yrs=5 years) 5 years could be around 10$ x 5 = 50$. But if you buy it for 5 years, then the price is 5.99 per year. So, the total price could be around 5.99$ x 5= 29.95$ for 5 years package. Now you can ask yourself. How much you can save if go with 5 years package? I think it could be around 50$-29.95$= 20.05$. Note that the price is variable. It depends on Namecheap.
- It will save your time, but how? If you go with 1 year package, then you will be needed to buy SSL certificate every year, then have to install it on your website. The total process is time comsuming, but all professional want to save their time. So, if you want to save your time then go with the maximum years package.
Step 2: Install the PositiveSSL certificate from CPanel.
In this step, Log in to your Cpanel. In the Cpanel dashboard, find the Namecheap SSL button. You can see the page in the screenshot as a reference.
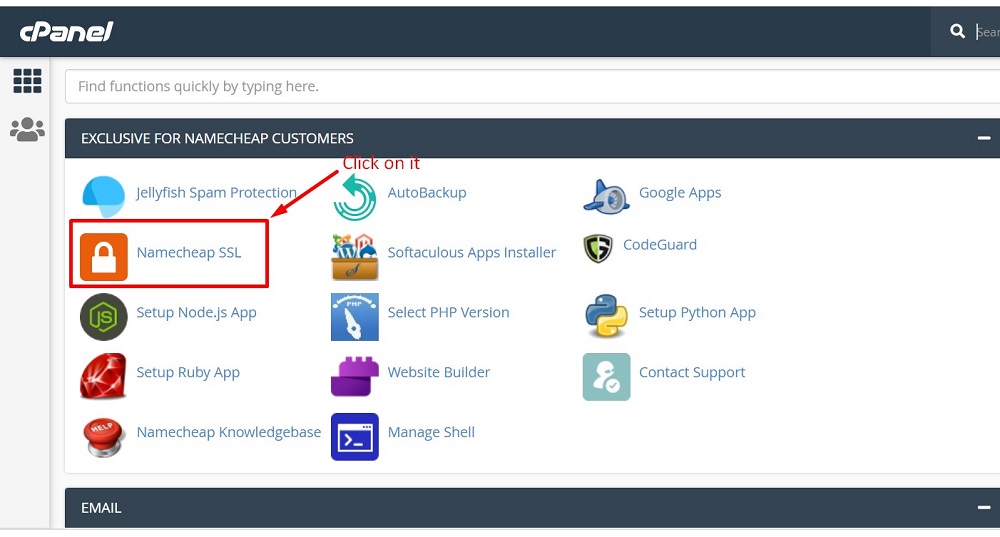
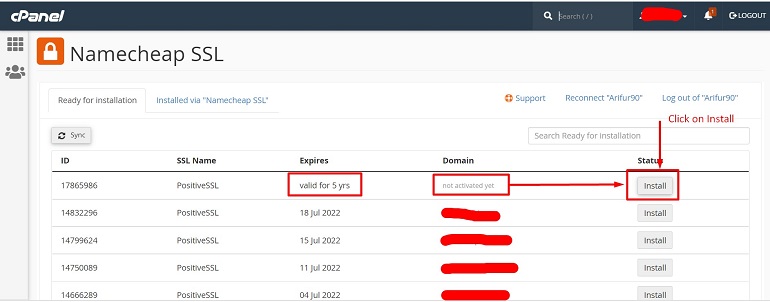
Then click on Namecheap SSL button. It will take you to the Namecheap SSL page. On the page, you will see all the not activated PositiveSSL. In the below screenshot image, you can see that I’ve one SSL certificate that is not activated yet. So, I will now click on the Install button to install it on one of my websites.
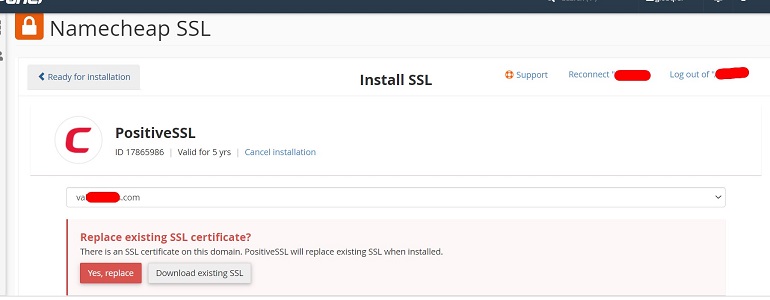
Once You have clicked on the Install Button, it will take you to the next page. The page looks like the below screenshot image. This is the final page where you can install Your PositiveSSL certificate on your expected domain. For this. Click on the Select Domain button. Then you can see all the Domains those are installed on your hosting Cpanel. From there, select your expected domain on that you want to install the PositiveSSL certificate. For your better understanding, please see the below images as a reference. Now, replace the existing SSL certificate with a new one. For this, click on the Yes, Replace. Once you click on it, then you will get a message like “Existing SSL will be uninstalled when we install new SSL” and Namecheap Admin details. In the Admin details, Just confirm that you’ve inserted the right Namecheap account Email id where from you’ve bought the PositiveSSL certificate.

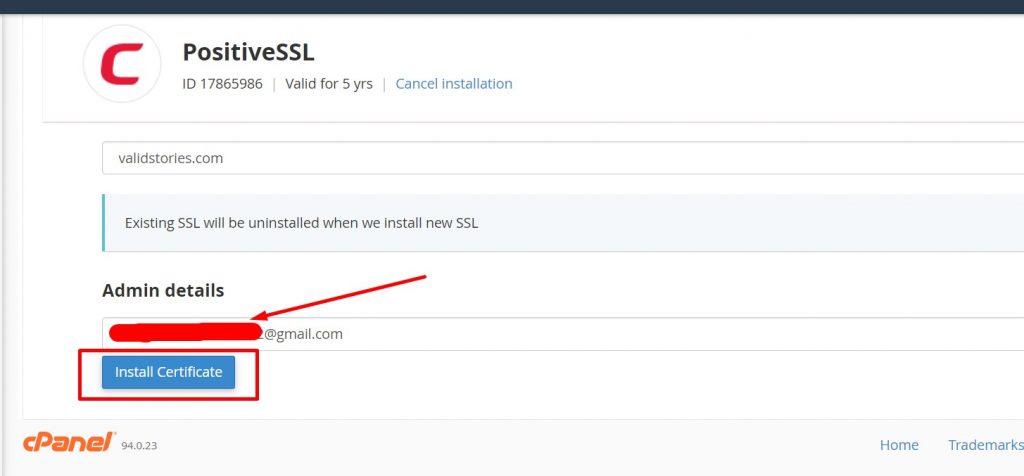
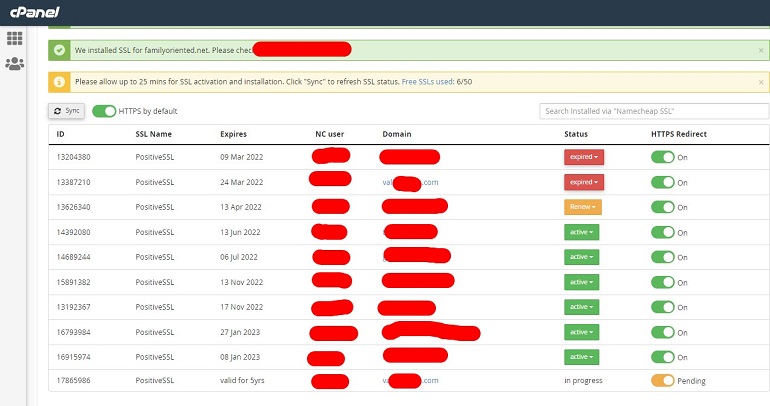
Then click on the Install Certificate button to install the SSL certificate. It will take you to a page that you can see in the below image. If you see that it shows the PositiveSSL certificate in progress or pending. It means it’s been installed successfully. It could take a few minutes to show the Active signal. So, don’t worry if you see it doesn’t show active signal instantly.
I think my blog helps you a lot. Moreover, if you have any questions regarding the SSL certificate then feel happy to let me know through the comment section. I will try my best to fix your issues.
Thank you!


Leave a Reply